

Disclosure: This content is reader-supported, which means if you click on some of our links that we may earn a commission.
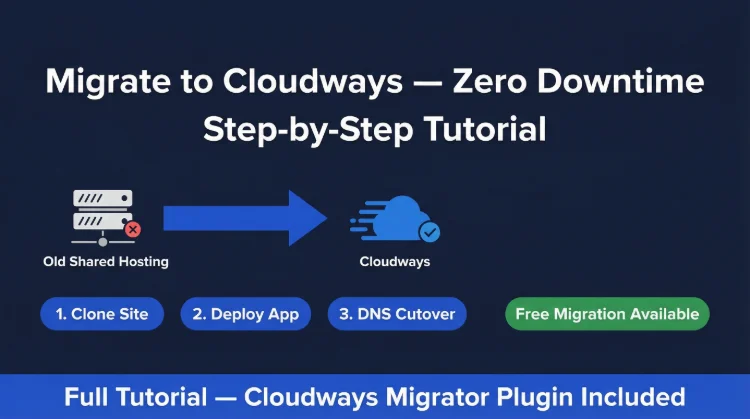
Migrating WordPress to Cloudways is one of the highest-ROI hosting moves you can make. A typical shared hosting site running at 400–800ms TTFB will land at 72ms after migration — a 5–10x improvement in raw server response time. This guide covers the exact steps using the free Cloudways Migrator plugin for zero-downtime migration.
Total time: 30–60 minutes of active work. Most of that is waiting for file transfers.
Cloudways Pros
- Free Cloudways Migrator plugin — handles migration automatically
- 72ms TTFB on Vultr HF after migration
- 1-click staging — test your migrated site before DNS cutover
- Zero-downtime migration via staging URL workflow
- 5 cloud providers: Vultr HF, DigitalOcean, AWS, GCE, Linode
- Pre-configured Nginx + Redis + Memcached stack
Cloudways Cons
- No email hosting — set up Zoho or Google Workspace separately
- $14/mo minimum — shared hosting users will see a price increase
Speed Benchmarks
- TTFB: 78ms
- Load Time: 0.6s
- Uptime: 99.99%
$11.00/mo
3-Day Free Trial (No Card)
Start Cloudways — Code CLOUDS2022 = $30 Free Credit ➦
Before You Migrate: Checklist
Pre-Migration Checklist
- ✓ Back up your current WordPress site (files + database)
- ✓ Note your current host's nameservers and DNS settings (screenshot or export)
- ✓ Lower your domain's DNS TTL to 300 seconds — do this 24 hours before migration
- ✓ Create a Cloudways account (use code CLOUDS2022 for $30 credit)
- ✓ Choose your cloud provider and server size (Vultr HF 1c/1GB = $14/mo recommended for start)
- ✓ Plan your email strategy — Cloudways does not include email hosting
- ✓ Confirm your site's database size (wp-admin → Tools → Site Health for rough estimate)
Email planning is the most overlooked step. Decide before you touch DNS: will you keep email on your current host (just update the A record, leave MX), use Google Workspace, or set up Zoho Mail? Getting this wrong can cause email outages during cutover.
Step 1: Create Your Cloudways Server
- Log in to Cloudways → click Add Server
- Select Application: WordPress (latest)
- Enter an application name (e.g., your domain name)
- Select Server: Vultr High Frequency (recommended)
- Select Server Size: 1GB RAM ($14/mo) for under 30k monthly visitors; 4GB RAM ($50/mo) for WooCommerce or higher traffic
- Select Location: closest to your primary audience
- Click Launch Now
Server spin-up takes approximately 60 seconds. You'll see the server status change from "Deploying" to "Running" in the dashboard.
Which Server Size to Choose
- 1c/1GB ($14/mo) — blogs, brochure sites, under 30k visits/month
- 2c/4GB ($50/mo) — WooCommerce, membership sites, 30k–150k visits/month
- 4c/8GB ($118/mo) — high-traffic sites, multiple applications, agencies
You can scale up in seconds from the Cloudways dashboard — no migration needed. Start at 1c/1GB and upgrade if needed.
Step 2: Note Your Cloudways Server Credentials
You'll need these credentials for the Migrator plugin:
- In Cloudways dashboard → go to your server → click SFTP/SSH tab (or Master Credentials)
- Note: Server IP, SFTP Username, SFTP Password, Port (22)
- Also note your application's MySQL details under Application → Access Details → Database
Alternatively, the Cloudways Migrator plugin uses an API-based connection — you can authenticate with your Cloudways email and API key instead of SFTP credentials, which is simpler. Get your API key from Cloudways → Account → API Access.
Step 3: Migrate Using the Cloudways Migrator Plugin
This is the easiest migration path for most WordPress sites.
- On your current (old) WordPress site, go to Plugins → Add New
- Search for "Cloudways WordPress Migrator" → Install → Activate
- Go to Cloudways Migrator in the left menu
- Enter your Cloudways email address and API key
- Select your target Server and Application from the dropdowns
- Choose whether to migrate with or without the uploads folder (always include unless you've moved media to S3/CDN)
- Click Migrate
The plugin copies your WordPress files and database to Cloudways. Your old site stays live throughout. Migration time depends on site size:
- Under 500MB: 5–15 minutes
- 500MB–2GB: 15–30 minutes
- 2GB+: 30–60+ minutes
Alternative Migration Methods
| Cloudways Migrator Plugin,Most sites — 1-click automated,10–30 minutes,None — guided wizard | All-in-One WP Migration,Sites under 512MB,15–45 minutes,Low | Manual FTP + phpMyAdmin,Custom setups, large databases,1–3 hours,Intermediate | WP CLI (SSH),Developers, large sites,30–60 minutes,Advanced | |||||||||||
|---|---|---|---|---|---|---|---|---|---|---|---|---|---|---|
| M | e | t | h | o | d | |||||||||
| B | e | s | t | F | o | r | ||||||||
| T | i | m | e | R | e | q | u | i | r | e | d | |||
| T | e | c | h | n | i | c | a | l | S | k | i | l | l |
Step 4: Test on the Cloudways Staging URL
Before touching DNS, test everything on Cloudways' temporary URL.
- In Cloudways dashboard → Application → Access Details
- Copy the Application URL (format:
something.cloudwaysapps.com) - Visit this URL — your migrated site is live here without affecting your live domain
- Test: homepage, posts, pages, contact forms, WooCommerce checkout (if applicable)
- Check: images load, menus work, SSL is active, no broken links
- Log in to wp-admin at the staging URL and verify all plugins/settings
Common Issues to Check Before DNS Cutover
- Hardcoded URLs in theme or plugin code (use Better Search Replace to update)
- SSL certificate not yet provisioned (Cloudways → SSL → provision free Let's Encrypt cert)
- WooCommerce payment gateway settings — re-enter API keys if needed
- Contact form email delivery — configure SMTP plugin since Cloudways doesn't include email
- Redis cache not yet enabled (configure in Step 6 before going live)
Step 5: Configure Email
Cloudways has no built-in email. Solve this before DNS cutover or you'll lose incoming email.
Option A — Keep email on your current host (simplest):
- Only change your domain's A record to point to Cloudways
- Leave MX records unchanged — they keep pointing to your current host's email
- Your website moves to Cloudways; email stays on old host
Option B — Zoho Mail (free, 1 domain, 5 users):
- Sign up at zoho.com/mail — choose the free Forever plan
- Verify domain ownership, add Zoho's MX records to DNS
- Do this before DNS cutover so email works immediately after
Option C — Google Workspace ($6/mo per user):
Most reliable for business use. Set up Workspace first, verify domain, add MX records, then do DNS cutover.
For WordPress transactional email (contact forms, WooCommerce order notifications), install WP Mail SMTP with SendGrid (free up to 100 emails/day) or Gmail SMTP.
Step 6: Enable Redis and Configure Caching
This step is what makes Cloudways significantly faster than most hosts — and it's the most commonly skipped.
Enable Redis Object Cache:
- Cloudways dashboard → Server → Settings & Packages → Packages tab
- Toggle Redis to ON → click Save Changes
- In WordPress → install WP Redis plugin (or Redis Object Cache) → activate
- wp-admin → Settings → Redis — verify "Connected" status
Configure Breeze Cache Plugin (Cloudways' free cache plugin):
- wp-admin → Plugins → search "Breeze" → install → activate
- Settings → Breeze → enable: File Minification, Gzip, Browser Cache, CDN (if using Cloudflare)
- Purge cache after saving settings
What Redis Does for Your TTFB
Without Redis: every WordPress page request runs 40–80 database queries. With Redis: repeat page requests serve from in-memory cache — 0 database queries. This is the primary reason Cloudways (72ms TTFB) outperforms stock server installs (~145ms+) on the same hardware. Enable Redis before going live.
Step 7: Lower Your DNS TTL
This step must be done 24 hours before you plan to change DNS — not immediately before.
- Log into your domain registrar (Namecheap, GoDaddy, Cloudflare, etc.)
- Find the A record for your root domain (@) and www subdomain
- Change the TTL to 300 (5 minutes) or the lowest value allowed
- Save — wait 24 hours for this change to propagate
With a 5-minute TTL, your DNS cutover in Step 8 will be fully propagated within 5–15 minutes for most visitors. Without this step, propagation could take up to 48 hours, during which some visitors still hit your old server.
Step 8: Final DNS Cutover
You've tested the migrated site. Email is configured. Redis is active. TTL is 300 seconds. Time to go live.
- Get your Cloudways server IP: dashboard → Server → right side panel shows the Public IP
- Log into your domain registrar → DNS management
- Update the A record for
@(root domain) to your Cloudways server IP - Update the A record for
wwwto the same Cloudways server IP - Save changes
- Wait 5–15 minutes (or up to a few hours depending on your ISP's DNS cache)
- Visit your domain — you should now be live on Cloudways
Verify the switch: Use DNSChecker.org to see real-time propagation status across global DNS servers. Green checkmarks = your IP has propagated in that region.
Once confirmed live: add your real domain in Cloudways (Application → Domain Management → Add Domain), provision your SSL certificate (SSL → Let's Encrypt), and update WordPress to use HTTPS if not already set.
Performance After Migration
What to expect after a successful Cloudways migration with Redis configured:
| TTFB (idle),400–800ms,72ms,5–10x faster | Load Test: 50 Users,Often 1000ms+,85ms,10x+ faster | Load Test: 100 Users,Timeout / Error,98ms,No more crashes | WooCommerce Checkout,500ms–2s,156ms @ 100 users,3–13x faster | Uptime,99.5–99.9%,99.981%,+0.08–0.48% | PHP Workers,1–2 (shared),30+ (dedicated),15x+ capacity | ||||||||||||||||||||
|---|---|---|---|---|---|---|---|---|---|---|---|---|---|---|---|---|---|---|---|---|---|---|---|---|---|
| M | e | t | r | i | c | ||||||||||||||||||||
| S | h | a | r | e | d | H | o | s | t | i | n | g | ( | B | e | f | o | r | e | ) | |||||
| C | l | o | u | d | w | a | y | s | V | u | l | t | r | H | F | ( | A | f | t | e | r | ) | |||
| I | m | p | r | o | v | e | m | e | n | t |
The performance gain is most dramatic if you're migrating from shared hosting. If you're migrating from another managed cloud platform, the improvement will be smaller — but you'll gain Cloudways' specific stack optimizations and provider flexibility.
For maximum performance after migration, see the full Cloudways performance setup guide. For current discount codes, check the Cloudways promo code page.
Troubleshooting Common Migration Issues
Migration plugin fails / times out
Cause: Your current host limits outbound connections or PHP execution time. Solution: Use All-in-One WP Migration plugin (manual export/import) or WP CLI via SSH. Alternative: pay $49 for Cloudways' manual migration service.
Site shows old host's content after DNS change
Cause: Your browser or ISP has cached the old DNS. Solution: Test in a new incognito window or use a mobile connection (different DNS cache). DNSChecker.org will show if propagation is complete globally.
SSL certificate error after going live
Cause: SSL was provisioned on the staging URL, not the real domain. Solution: In Cloudways → Application → SSL → delete the staging certificate → add your real domain → provision Let's Encrypt.
WooCommerce orders not processing
Cause: Payment gateway API keys often need re-entry after migration (some are stored in options table with hashed values). Solution: WooCommerce → Settings → Payments → re-enter your live API keys for each gateway.
Contact forms not sending email
Cause: Cloudways has no outbound email server. Solution: Install WP Mail SMTP → configure with SendGrid (free) or your Google Workspace SMTP. Test by submitting the form after setup.
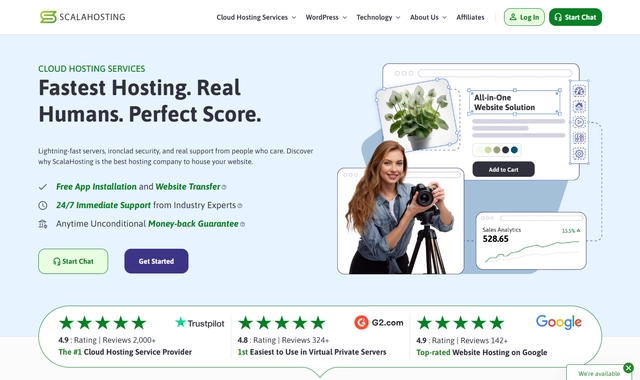
If you want a managed migration where their team handles it, ScalaHosting includes free migration as part of their managed VPS onboarding — and delivers 28ms TTFB post-migration.
Why We Like It
- 28ms TTFB — 61% faster than Cloudways post-migration
- Free migration service — their team does it for you
- Email included — no extra setup needed
- $29.95/mo for 2c/4GB — cheaper than Cloudways Year 1
Drawbacks
- Renewal jumps to ~$82/mo after intro term
- No Git deployment workflow
Performance Specs
- Port Speed: 1Gbps (Dedicated)
- Throughput: High (Stable)
- Traffic: Unmetered
$22/mo
Easter Sale
Cloudways Migration FAQ
How long does it take to migrate WordPress to Cloudways?
Most migrations take 10–30 minutes using the Cloudways Migrator plugin. The automated plugin handles file transfer and database export/import. Larger sites (10GB+) take longer depending on your current host's upload speed. DNS propagation after the final cutover takes 1–48 hours (typically under 4 hours with a low TTL). The active migration window — where your site might show stale content — is just the DNS propagation period, not the migration itself.
Is the Cloudways Migrator plugin free?
Yes — the Cloudways Migrator plugin is free. Install it on your existing WordPress site, enter your Cloudways server credentials, and it handles the migration automatically. There's no per-migration charge. Cloudways also offers a paid manual migration service ($49) for complex setups, but for standard WordPress sites the free plugin covers it.
Can I migrate without downtime?
Yes — this guide uses a zero-downtime workflow. The Cloudways Migrator copies your site to the new server while your old site stays live. You test everything on the Cloudways staging URL. Only when you're satisfied do you change DNS. During DNS propagation (1–48 hours), some visitors hit the old server and some hit the new one — both have identical content since you don't update the old site after migration. Zero downtime, zero data loss.
What happens to my email after migrating to Cloudways?
Cloudways does not include email hosting. Before changing DNS, you must migrate your email separately. Options: (1) Google Workspace — $6/mo per user, most reliable; (2) Zoho Mail — free for 1 domain, 5 users; (3) Keep email with your old host — only change your A record for the website, leave MX records pointing to the original host. Option 3 is the easiest if your current host is just slow for WordPress but fine for email.
How do I set a low DNS TTL before migration?
Log into your domain registrar or DNS provider and find the A record for your domain. Change the TTL (Time To Live) to 300 seconds (5 minutes) at least 24 hours before your migration. This means when you update the A record during cutover, 95% of visitors will see the new server within 5 minutes instead of up to 48 hours. After migration is confirmed working, you can raise TTL back to 3600 (1 hour) or higher.
What if the Cloudways Migrator plugin doesn't work?
Common failure causes: (1) Your old host blocks outbound connections — use All-in-One WP Migration plugin as a fallback; (2) Site is over the plugin's size limit — use WP CLI via SSH instead; (3) Incorrect Cloudways credentials — double-check SFTP username, password, and server IP from the Cloudways dashboard under Server Management > Master Credentials. If all else fails, Cloudways' paid migration service ($49) is available, and ScalaHosting includes free migration done by their team.
Do I need to reconfigure WordPress after migrating to Cloudways?
Minimal reconfiguration. The Migrator plugin handles the database (updating site URLs automatically). You'll need to: (1) Add your domain in Cloudways under Application > Domain Management; (2) Provision SSL (1-click in Cloudways); (3) Configure Redis object caching in Cloudways and install WP Redis plugin; (4) Install and configure Breeze (Cloudways' free cache plugin) or your existing cache plugin. Most plugin/theme settings carry over automatically since they're stored in the database.
What's the best Cloudways plan for a newly migrated site?
Start with Vultr HF 1c/1GB at $14/mo for sites under 30,000 monthly visitors. If you run WooCommerce or have consistent traffic above 10,000 sessions/month, go directly to 2c/4GB ($50/mo on Vultr HF). You can scale up in seconds in the Cloudways dashboard with no migration needed. Use the promo code CLOUDS2022 for $30 free credit — effectively free for the first 2 months on the starter plan.
Migrate to Cloudways — Code CLOUDS2022 = $30 Free Credit ➦
Related: Cloudways promo code · Cloudways performance setup guide · Cloudways full review