
Nameservers Explained: The Full DNS Resolution Chain and How to Change Them Safely

Your nameservers determine who answers every DNS query about your domain. Pick the wrong configuration and you miss Cloudflare performance protection, lose email routing during a migration, or lock your reseller clients into provider-branded DNS they cannot control. Pick the right one and a single 15-minute change adds a CDN, DDoS protection, and a firewall to any site, for free.
This page covers the complete nameserver decision. The first part explains the authority layer — what nameservers are, how the resolution chain works, and why NS propagation behaves differently from record-level changes. The second part covers the migration sequence that avoids downtime. The third part covers the reseller setup that most DNS guides skip entirely: how to create custom white-label nameservers so your clients see ns1.youragency.com instead of your hosting provider's brand.
What Nameservers Actually Do (And Why Changing Them Is Not Changing DNS Records)
Most people who've dealt with a domain migration think: "my domain is pointed at my host, and changing nameservers re-points it somewhere else." That's approximately correct in effect but completely wrong in mechanism — and that gap causes expensive mistakes.
Nameservers are not routing instructions. They are authority declarations. When you set nameservers for your domain, you're telling the global DNS system: "for all questions about this domain, ask these servers."
The nameservers then hold your DNS zone — the collection of records (A, MX, CNAME, TXT, and more). The nameserver does not point your domain anywhere. It stores and serves the records that do the actual pointing. That's a meaningful difference.

The second misconception: nameserver changes and DNS record changes have very different propagation timelines.
- A record change at TTL 300 → globally visible in 5–15 minutes
- NS record change → takes 24–48 hours regardless of TTL — the TLD registry controls NS cache expiry, not you
The records that live on nameservers are covered in full on the DNS records reference page. Here's a quick visual of every record type your nameserver holds:
This page focuses on the authority layer: who serves those records and how to move between providers safely.
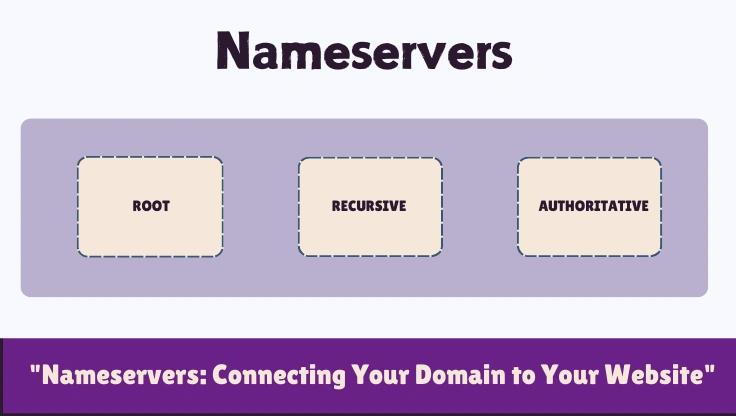
The Full DNS Resolution Journey: From Browser to IP Address
A browser has no direct relationship with your nameserver. It goes through four other systems first — and understanding each hop explains propagation behavior, performance characteristics, and exactly why some DNS problems take hours to surface while others appear instantly.

Here is what happens on a cold DNS lookup for domain.com:
Step 1: OS cache check. The browser asks the operating system: do you have a cached record for domain.com? If yes, the OS returns it immediately — no network request needed. Cache duration is controlled by the record's TTL. On Mac, DNS cache entries respect TTL. On Windows, the DNS Client service caches records and respects TTL with some rounding. If the OS has the record cached, the lookup ends here in under 1 millisecond.
Step 2: Recursive resolver query. If the OS has no cached record, it forwards the query to a recursive resolver — typically your ISP's resolver, or a public resolver like Google's 8.8.8.8 or Cloudflare's 1.1.1.1. The recursive resolver does all the remaining work on behalf of the client. It is called "recursive" because it performs multiple queries to find the answer. Resolvers also cache records, again according to TTL. This is the cache that controls what most users see after a DNS change.
Step 3: Root nameserver query. The recursive resolver asks a root nameserver: who handles .com domains? There are 13 root nameserver clusters (labeled a through m). They do not know about domain.com specifically — they only know which TLD servers to ask for .com queries. Response time at this hop: under 10ms due to Anycast routing. The resolver caches this answer for 48 hours, so most resolvers skip this step on repeat queries.
Step 4: TLD nameserver query. The resolver asks the .com TLD nameserver: who is authoritative for domain.com? The TLD server returns the NS records for domain.com — the nameservers you configured at your registrar. This is the hop where NS propagation is controlled. The TLD caches NS records typically for 24-48 hours. When you change nameservers at your registrar, the update travels to the TLD registry within minutes, but the TLD cache holds the old value for its full TTL duration.
Step 5: Authoritative nameserver query. The resolver asks your authoritative nameserver: what is the A record for domain.com? Your nameserver returns the IP address with the TTL you configured. The resolver caches this response and returns it to the client.
Step 6: IP returned to browser. The browser now has the IP address. It opens a TCP connection to that IP and begins the HTTP request. This is where TTFB (Time to First Byte) begins — DNS resolution is the step before TTFB, and it adds latency that TTFB measurements often obscure.
The IP address that the resolver returns is the IP of your web server — which relates directly to how IP addresses work in hosting. Shared hosting means multiple domains share one IP. Dedicated IP means one IP serves one account. Your nameserver does not care which — it returns whatever A record value you set.
Host Nameservers vs Cloudflare Nameservers vs Registrar DNS: A Decision Framework
The default when you buy hosting is to use your host's nameservers. The default when you buy a domain is your registrar's nameservers. Neither of these defaults is optimal for most production sites. The question is whether the improvement from switching is worth the 15 minutes of work.

| Feature | Host Nameservers | Cloudflare Nameservers | Registrar Nameservers |
|---|---|---|---|
| DDoS Protection | No | Yes — free, always on | No |
| CDN (edge caching) | Sometimes (host-dependent) | Yes — 300+ PoPs | No |
| Web Application Firewall | No | Yes — free tier included | No |
| DNS Resolution Speed | 100–300ms (avg) | ~10ms (globally) | 50–200ms (avg) |
| DNS Management Interface | Host control panel | Cloudflare dashboard (excellent) | Registrar dashboard (often poor) |
| Email Record Control | Full — via host panel | Full — via Cloudflare dashboard | Full — via registrar panel |
| Proxy (hide origin IP) | No | Yes — orange cloud mode | No |
| DNSSEC Support | Host-dependent | Yes — one click | Registrar-dependent |
| Free Plan Available | Yes (included with hosting) | Yes | Yes (included with domain) |
The numbers in the DNS speed row are real performance differences. Host nameservers typically resolve in 100-300ms because they are single-server setups without global Anycast distribution. Cloudflare runs 300+ points of presence globally with Anycast routing, which means queries go to the nearest node rather than a single geographic server. The ~10ms resolution time is Cloudflare's publicly documented 99th percentile for DNS queries.
For sites hosted on shared hosting with no built-in CDN, switching to Cloudflare nameservers is the highest-value improvement available. It adds a CDN, DDoS protection, and a WAF without changing your hosting plan, paying for anything, or reconfiguring your server. The only thing that changes is where DNS queries are answered.
Host nameservers make sense in one specific scenario: your host provides a managed control panel that auto-configures DNS records when you add domains, install SSL certificates, or set up email. SiteGround and Cloudways both do this. If you move to Cloudflare nameservers, you take over manual responsibility for keeping DNS records updated. For people who prefer zero DNS management, staying on host nameservers is reasonable — you just forfeit the CDN and security benefits.
| Your Situation | Use These Nameservers | Key Consideration |
|---|---|---|
| You want Cloudflare CDN, WAF, and DDoS protection | Cloudflare nameservers | Free plan is sufficient for most sites. DNS management moves to Cloudflare dashboard. |
| You want everything managed in one place by your host | Host nameservers (e.g. ns1.siteground.net) | Simplest setup. No Cloudflare benefits. Fine for sites with low traffic or a managed host with built-in CDN. |
| You are a reseller giving clients white-label DNS | Custom nameservers (e.g. ns1.youragency.com) | Requires glue records and WHM/cPanel configuration. Covered in full in Section 7. |
| You use a specialized email provider and want control | Cloudflare or host nameservers plus manual MX records | Either works. Cloudflare gives better DNS management UI. MX records must be added manually after switch. |
| Your registrar's DNS panel is the only option you have set up | Registrar nameservers | Acceptable starting point. Most registrar DNS dashboards are limited. Moving to Cloudflare is a one-time 15-minute improvement. |
| You are migrating to a new host without downtime | Keep current NS, change A records only | Change only the A record pointing to your new server IP. NS change is unnecessary and adds propagation time. |
Registrar nameservers deserve one direct statement: they are almost always the worst option of the three. Every major registrar's DNS management interface is inferior to Cloudflare's dashboard. GoDaddy's DNS panel has a feature history of breaking records during edits. Namecheap's is functional but slow to propagate. Squarespace Domains (formerly Google Domains) is the one exception — it is clean and fast, but it still lacks Cloudflare's security features. If you are currently using registrar nameservers, moving to Cloudflare is a strictly better configuration.
When Cloudflare Nameservers Win (And When They Add Complexity You Do Not Need)
Cloudflare's free plan delivers more infrastructure value than most hosting add-ons that cost $5-20 per month. The catch is not price — it is operational ownership. When you switch to Cloudflare nameservers, you own DNS management completely.
What Switching to Cloudflare Nameservers Adds
The orange cloud proxy is the core value. When a DNS record is proxied (orange cloud), Cloudflare terminates the visitor's connection at its nearest edge node — not at your origin server. Traffic passes through the Cloudflare network, which adds several things simultaneously: the Anycast CDN serves cached assets from edge nodes near the visitor, the WAF checks all requests against a rule set that blocks common attack patterns, DDoS mitigation absorbs volumetric attacks before they reach your origin, and Cloudflare's IP is returned in DNS lookups instead of your actual server IP — so origin IP enumeration attacks become significantly harder.
For a site on shared hosting, the CDN benefit alone changes TTFB meaningfully. A visitor in Singapore loading a site hosted in the US gets cached static assets from Cloudflare's Singapore node rather than making a round trip to the US origin. For a basic WordPress site where static assets (images, CSS, JS) represent 80% of page weight, this matters.
How to Switch: The Exact Process
Step 1: Add your site to Cloudflare. Go to cloudflare.com, create a free account, click "Add a site," enter your domain name, and select the Free plan. Cloudflare will scan your existing DNS records automatically and import them. Verify the imported records match your current DNS zone exactly — check A, CNAME, MX, TXT, and any service-specific records.
Step 2: Cloudflare gives you two nameserver hostnames (e.g. aria.ns.cloudflare.com and ben.ns.cloudflare.com — they are different for each account). Log into your domain registrar, find the nameserver settings for your domain, and replace the existing nameservers with the two Cloudflare ones. Save.
Step 3: Return to the Cloudflare dashboard and click "Check nameservers." Cloudflare verifies the change at the registrar level. Once confirmed, the status changes to Active. At this point Cloudflare is authoritative — but NS propagation to all global resolvers still takes 24-48 hours.
Step 4: Review the proxy settings on each record. A and CNAME records that serve your website should be proxied (orange cloud). MX records cannot be proxied. A records for mail subdomains (mail., smtp., imap.) should be DNS-only (grey cloud) — proxying mail subdomains breaks SMTP connections because Cloudflare only proxies HTTP/HTTPS traffic. The CDN mechanics page explains in full what proxied traffic does and does not cache.
When Cloudflare Nameservers Add Complexity
Cloudflare introduces friction in three specific scenarios:
- Auto-SSL hosts: Some managed hosts issue SSL certificates automatically when a domain points to their nameservers. Switching to Cloudflare can break auto-renewal. Verify SSL renewal behavior before switching.
- cPanel addon domains: If your host auto-adds DNS records via cPanel when you add domains, those records go into the host's zone — not Cloudflare. You must replicate them manually in the Cloudflare dashboard.
- Infrastructure-heavy DNS: Developers who auto-provision subdomains per client find Cloudflare's API excellent but the manual dashboard slow for bulk changes.
How to Change Nameservers Without Breaking Your Site: The Exact Sequence
The sequence matters. I have seen site owners do these steps in the wrong order and spend 12 hours restoring service. The correct order is: prepare the destination, verify the destination, then switch. Never switch first and configure second.
Safety Checklist Before Changing Nameservers
dig A yourdomain.com @new-nameserver-ip and dig MX yourdomain.com @new-nameserver-ip. The new nameserver must return correct answers before you flip the switch at the registrar.dig NS yourdomain.com @a.gtld-servers.net to check the TLD source directly. When this returns the new nameservers, the registry update is complete.Registrar-Specific Instructions
Namecheap: Log in → Dashboard → Domain List → Manage (next to your domain) → Nameservers dropdown → Select "Custom DNS" → Enter your nameservers one per field → Save (green checkmark). The change takes effect at the Namecheap registry within 30 minutes.
GoDaddy: Log in → My Products → DNS (next to your domain) → Nameservers section → Change → Enter Your Own Nameservers → Enter both nameservers → Save. GoDaddy adds a confirmation step with a 48-hour warning — this is their standard disclaimer, not an actual delay.
Cloudflare Registrar (domains registered at Cloudflare): Cloudflare domains default to Cloudflare nameservers. If you need to change to custom nameservers, go to Websites → your domain → DNS → Nameservers → Change your nameservers. Note: Cloudflare strongly encourages keeping their nameservers for domains registered with them, but custom NS is supported.
Squarespace Domains (formerly Google Domains): Log in → Domains → Manage → DNS → Nameservers → Edit → Use custom nameservers → Enter both → Save. Squarespace propagates the registry update quickly — typically within 15 minutes.
Verifying the change: after updating at your registrar, run dig NS yourdomain.com repeatedly over the next few hours. When your local resolver returns the new nameservers, NS propagation is complete for your location. For a global view, use dnschecker.org and select NS record type.
NS Propagation Is Different: Why Nameserver Changes Take 24 to 48 Hours (And A Record Changes Do Not)
People apply what they know about A record propagation to nameserver changes and get confused when the behavior does not match. The confusion is reasonable — both are DNS changes, both should be subject to TTL rules. But they operate at different layers of the DNS hierarchy, and the layer controls who sets the cache expiry.

Why A Record Propagation Is Under Your Control
An A record lives at your authoritative nameserver. The TTL you set on that record tells recursive resolvers how long to cache it. Set TTL to 300 and resolvers re-query your nameserver every 5 minutes. Set TTL to 86400 and they cache for 24 hours. You control the TTL value, so you control the propagation window. This is why the pre-migration TTL-lowering strategy works: you lower to 300, wait for existing cached values to expire, then make the change knowing that the maximum propagation time is now 5 minutes.
Why NS Propagation Is Not Under Your Control
NS records for your domain are stored at the TLD registry, not at your nameserver. When you update nameservers at your registrar, the change goes to the TLD registry (the .com servers, the .net servers, etc.). The TLD registry caches your NS records with its own TTL value — typically 48 hours for .com, .net, and .org. That TTL is set by the registry operator, not by you. Even if you could set your NS record TTL to 300, the TLD's cached copy would still hold the old value for up to 48 hours.
| Record Type | Cached At | Typical Propagation Window | Notes |
|---|---|---|---|
| A record | Your DNS provider | 5–15 minutes (TTL 300), up to 1 hour (TTL 3600), up to 24 hours (TTL 86400) | Entirely controlled by TTL. Lower TTL before planned changes. |
| CNAME record | Your DNS provider | 5–15 minutes (TTL 300), similar to A record | Same TTL rules as A records apply. |
| MX record | Your DNS provider | 5–30 minutes (TTL 300 to 3600) | Email in transit during change is not lost — existing sessions complete before new MX takes over. |
| NS record (nameserver) | TLD registry (.com, .net, etc.) | 24–48 hours regardless of TTL preference | TLD servers control NS TTL. This is not under your control. Plan accordingly. |
| Glue records | TLD registry | Up to 48 hours after NS change | Glue records are stored alongside NS records at the TLD. Same propagation window applies. |
Checking Real NS Propagation Status
Most propagation-checking tools query recursive resolvers that may themselves be caching old data. To check the definitive source, query the TLD server directly:
dig NS yourdomain.com @a.gtld-servers.netThis sends the NS query to a.gtld-servers.net, which is a .com TLD nameserver. The response shows exactly what the TLD registry holds. If this returns your new nameservers, the registry update is confirmed and global propagation will complete as resolver caches expire. If it still shows old nameservers, the registry update has not yet taken effect — wait longer and try again.
For .net domains, use @a.gtld-servers.net. For .org domains, use @b0.org.afilias-nst.org. For country TLDs (.uk, .de, .au), query the specific TLD server listed in whois output.
After the TLD update confirms, individual recursive resolver caches will expire over the following hours. Some ISP resolvers cache aggressively past the TTL expiry — this is rare but legitimate. If dig @8.8.8.8 shows the new NS but your browser still shows the old site, the issue is your local machine's DNS cache. On Mac: sudo dscacheutil -flushcache && sudo killall -HUP mDNSResponder. On Windows: ipconfig /flushdns.
Custom Nameservers for Reseller Hosting: The Complete White-Label Setup
If your reseller hosting clients see ns1.siteground.net or ns1.scalahosting.com in their domain settings, your infrastructure is visible. A client who knows your hosting provider can price-shop directly, compare your value proposition against the raw host price, or simply wonder why they are paying you if the host is right there. Custom nameservers like ns1.youragency.com remove that visibility entirely.
Beyond branding, custom nameservers give you operational control. If you need to migrate client sites to a different server or host, you change the IP addresses behind your custom NS rather than asking every client to update their registrar settings. That is the infrastructure advantage most resellers do not realize until their first server migration.

What You Need Before Starting
You need a domain that you own (this will be the nameserver domain, e.g. youragency.com), a reseller hosting account with WHM access, and the two server IP addresses your host assigns to nameserver functions. Your host provides these IPs — check your WHM welcome email or the Basic cPanel/WHM Setup screen under Server Configuration. You need two IPs and two nameserver hostnames. One of each is not sufficient because all TLDs require a minimum of two nameservers for redundancy.
Step-by-Step Setup
| Step | Action | Where to Do It | Why It Matters |
|---|---|---|---|
| 1 | Register your reseller hosting account and note the two IP addresses for your nameserver servers | Your host provides these — typically listed in WHM under Server Configuration or Basic cPanel/WHM Setup | Required before any other step |
| 2 | Log into your domain registrar for the domain you want to use as your nameserver hostname (e.g. youragency.com) | Navigate to Advanced DNS or Nameserver settings — look for 'Child nameservers' or 'Host records' | This is where glue records are created |
| 3 | Create child nameserver: ns1.youragency.com pointing to IP1 | Enter ns1, then the first server IP. Save. | Must match exactly what WHM expects |
| 4 | Create child nameserver: ns2.youragency.com pointing to IP2 | Enter ns2, then the second server IP. Save. | You need two — all TLDs require a minimum of two nameservers |
| 5 | Log into WHM and navigate to Basic cPanel/WHM Setup | Set Primary Nameserver to ns1.youragency.com and Secondary Nameserver to ns2.youragency.com. Save. | WHM must match your registrar glue records exactly |
| 6 | Wait 30–60 minutes for internal propagation, then verify | Run: dig A ns1.youragency.com — should return the IP you registered. Run: dig NS youragency.com — should show your custom nameservers. | Do not point client domains until this passes |
| 7 | For each client domain: instruct the client to update nameservers at their registrar to ns1.youragency.com and ns2.youragency.com | Client must do this at their own registrar. You cannot do it for them unless you have registrar access. | Propagation takes 24–48 hours per client domain |
Configuring WHM for Custom Nameservers
Log into WHM and navigate to: Server Configuration → Basic cPanel/WHM Setup. In the Nameservers section, enter your custom nameserver hostnames. Primary Nameserver field: ns1.youragency.com. Secondary Nameserver field: ns2.youragency.com. Save the configuration. WHM will use these hostnames in all DNS zone files it creates automatically for new accounts.
If you have existing accounts that were created before you set up custom nameservers, their DNS zones still reference the old nameservers. You can update them individually through WHM under DNS Functions → Edit DNS Zone, or you can do a bulk update via WHM's Edit DNS Zone interface. After the WHM update, you still need to tell each client to update their domain registrar — the DNS zone change alone does not move the NS delegation.
DNS Clustering for Multi-Server Setups
If your reseller infrastructure spans multiple servers — a primary cPanel server and a secondary cPanel server — you can configure DNS clustering in WHM so zone updates on the primary server automatically propagate to secondary servers. This keeps ns1 and ns2 genuinely in sync rather than requiring manual updates on both. The configuration is in WHM under Clusters → DNS Cluster. Both servers must have WHM access and must be configured to accept cluster connections from each other.
For most single-server reseller setups, DNS clustering is unnecessary. Both ns1 and ns2 can point to the same server IP — the redundancy requirement is about nameserver hostname count, not physical server count, for small setups.
Glue Records: The Circular Reference Problem and How to Fix It
Glue records exist because of a paradox that DNS would otherwise be unable to solve. The paradox: your domain ns1.youragency.com is the nameserver for youragency.com. A resolver that wants to find youragency.com asks the TLD server: who is the nameserver for youragency.com? The TLD answers: ns1.youragency.com. The resolver then needs to find the IP of ns1.youragency.com — which requires asking the nameserver for youragency.com. That is ns1.youragency.com again. Infinite loop.

Glue records break the loop. They are additional A records stored directly in the TLD registry response alongside the NS records. When the TLD says "the nameserver for youragency.com is ns1.youragency.com," it also says "and the IP of ns1.youragency.com is 192.0.2.1." The resolver gets both the NS hostname and the IP in one response. No further lookup needed. The circle is broken.
When You Do and Do Not Need Glue Records
You only need glue records when your nameserver hostname is within the domain it serves. If you are setting up ns1.youragency.com as a nameserver for youragency.com, you need glue records. If you use ns1.cloudflare.com as a nameserver for youragency.com, you do not — resolving ns1.cloudflare.com is a separate lookup for the cloudflare.com zone, and there is no circular dependency.
Creating Glue Records at Major Registrars
Namecheap: Domain List → Manage → Advanced DNS tab → "Personal DNS Servers" section at the bottom → Add Nameserver → Enter ns1, then IP1. Repeat for ns2 with IP2. Save.
GoDaddy: My Products → DNS next to your domain → scroll to Nameservers section → "Host Names" link (small, often missed) → Add → Enter ns1 and IP1. Repeat. Save.
Cloudflare Registrar: Websites → your domain → DNS → Manage → Custom Nameserver IPs → Add entries for ns1 and ns2 with their respective IPs.
Testing Glue Records
After creating glue records, verify them with:
dig A ns1.youragency.comIf this returns the IP you registered, the glue record is live and resolving. If it returns nothing or NXDOMAIN, the glue record has not propagated yet or was entered incorrectly. The most common error is an IP typo during entry — verify the exact IP with your host before retrying.
Also verify the NS record itself is present at the TLD level:
dig NS youragency.com @a.gtld-servers.netThe response should include both ns1.youragency.com and ns2.youragency.com in the AUTHORITY SECTION. If it shows the host's NS (e.g. ns1.scalahosting.com), you have not yet updated the NS records at your registrar to point to your custom nameservers.
The 7 Most Common Nameserver Mistakes (And What Breaks)
Every mistake in this list was found in a production site at some point. Several of them were found in my own configurations before I understood the mechanics. The pattern is always the same: someone knew what they wanted to achieve but did not understand which layer of the system controlled the outcome.
| Mistake | What Breaks | The Fix |
|---|---|---|
| Changing NS records before adding records at the new provider | Site goes down immediately when NS change propagates — new nameserver has no A records, no MX records, nothing | Add every DNS record (A, MX, SPF, DKIM, CNAME) to the new provider first. Verify with dig. Then change NS at registrar. |
| Forgetting to recreate MX records at the new nameserver | Email stops arriving. Existing email is not lost — mail servers queue it for 4–7 days — but every new message after the NS change bounces | Export your complete DNS zone before any NS migration. Check the new provider has all records including MX before switching. |
| Using nameservers from two different providers simultaneously | Resolvers get inconsistent answers depending on which NS they query. Some see the old records, some see the new. Site breaks intermittently in ways that are very hard to debug. | All nameservers for a domain must be at the same provider. Never mix. |
| Not updating glue records when server IP changes | Custom nameservers stop resolving. Every client domain on your reseller setup goes down simultaneously. | When your host migrates servers and changes IP addresses, you must update glue records at your registrar immediately. Check WHM change notices. |
| Pointing a client domain to custom NS before glue records exist | Domain fails to resolve entirely — no website, no email, nothing. TLD lookup for your NS returns no IP. | Always verify glue records resolve before pointing any client domain to your custom nameservers. |
| Expecting A record propagation speed after an NS change | People change NS and wonder why it has been 6 hours with no effect. NS propagation is 24–48 hours. A record propagation at TTL 300 is 15 minutes. These are different systems. | Plan nameserver migrations over 48+ hours. If you need fast propagation, change A records instead of nameservers. |
| Enabling DNSSEC at the registrar before configuring it at the DNS provider | Domain fails to resolve completely. DNSSEC validation fails because the DS record at the registrar points to a key that does not exist at your new nameserver yet. | Configure DNSSEC at the DNS provider first, get the DS record values, then add them to your registrar. Never the reverse. |
Myth: DNS propagation is always 24-48 hours. False. A record propagation is controlled by TTL. At TTL 300, propagation is 5-15 minutes. The 24-48 hour figure applies specifically to nameserver (NS) record changes, because the TLD registry controls NS cache expiry. Saying "DNS changes take 24-48 hours" conflates two different systems with completely different timing characteristics.
Myth: Lowering TTL speeds up NS propagation. False. Lowering your NS record TTL to 60 seconds at your current nameserver does nothing to the 48-hour cache the TLD holds on your NS delegation record. The TLD's TTL is set by the registry operator. You cannot change it. You can only wait for it to expire after the registrar update is submitted.
Myth: Both nameservers must be on different physical servers. False for small setups. Both ns1 and ns2 can resolve to the same IP. The requirement is that you have two distinct NS hostnames listed — the TLD rejects single-nameserver delegations. Physical redundancy is best practice but not enforced at the registry level for basic configurations.
DNS Security at the Nameserver Level: Hijacking, DNSSEC, and Registrar Locks
Nameserver-level attacks are more severe than record-level attacks because they affect everything at once. Changing one A record harms one hostname. Compromising nameserver authority harms every record under that domain simultaneously — website, email, subdomains, authentication, everything.
DNS Hijacking via Registrar Compromise
DNS hijacking does not usually require attacking nameservers directly. It requires compromising the registrar account that controls which nameservers the domain uses. An attacker who gains access to your registrar account can change nameservers to their own, then configure any records they want — redirecting traffic, intercepting email, obtaining fraudulent SSL certificates. The site owner may not notice for hours because everything looks normal from most locations while the attack targets specific geographic areas or specific users.
The defense is account-level security, not DNS-level security. Enable two-factor authentication on every registrar account. Use a dedicated email address for registrar accounts that is not shared with any other service. Enable registrar lock (clientTransferProhibited) on every production domain — this prevents domain transfers without an explicit unlock step, adding friction to theft attempts. Some registrars offer clientUpdateProhibited and clientDeleteProhibited for additional protection.
DNSSEC: Cryptographic Chain of Trust
DNSSEC adds cryptographic signatures to DNS responses. When a DNSSEC-aware resolver receives an answer from your nameserver, it verifies the signature against a public key chain that traces back to the DNS root. Cache poisoning attacks — where an attacker injects false DNS responses into a resolver's cache — cannot succeed because the injected response lacks valid cryptographic signatures.
The DNSSEC trust chain works like this: the DNS root zone is signed by ICANN. Each TLD (.com, .net) is signed by its registry operator. Your domain zone is signed by your DNS provider (Cloudflare does this with one checkbox). The link between your domain's DNSSEC key and the TLD is the DS (Delegation Signer) record that you add to your registrar. This creates an unbroken cryptographic chain from the DNS root down to your individual records.
Enabling DNSSEC correctly: configure it at your DNS provider first, obtain the DS record values from your provider, then add those DS records to your registrar. Doing it in the wrong order — adding DS to the registrar before your DNS provider is configured — causes complete resolution failure because DNSSEC validation fails and there is no fallback. For SSL certificate security, DNSSEC provides a complementary layer: even if a CA were somehow tricked into issuing a fraudulent certificate, DNSSEC prevents the certificate from being useful because DNS-level hijacking is blocked.
Security Actions by Priority
Account compromise is the primary attack vector. 2FA stops most unauthorized access.
Prevents unauthorized domain transfers. One checkbox in every major registrar.
Restricts which CAs can issue SSL for your domain. Limits certificate-based attack surface.
Cryptographic response validation. Prevents cache poisoning. Worth enabling for financial or sensitive domains.
Verify custom nameserver IPs match current server IPs after any host migration.
Diagnostic Workflow: dig, nslookup, whatsmydns for Nameserver Issues
When a nameserver change is not behaving as expected, the problem is always in one of three places: the registrar did not submit the update, the TLD has not yet updated its cache, or a resolver is caching stale data. Each of these requires a different verification step. The diagnostic commands below isolate which layer has the problem.

| Command | What It Checks | When to Use It |
|---|---|---|
| dig NS domain.com | Returns the current authoritative nameservers for the domain as seen by your local resolver | Verify which nameservers are live after a change. If the old NS still shows, propagation is not complete for your location. |
| dig NS domain.com @8.8.8.8 | Same query but forced through Google's public resolver — bypasses your local ISP resolver cache | Compare this against your local result to determine if your ISP resolver is caching old data. |
| dig NS domain.com @a.gtld-servers.net | Queries the .com TLD nameserver directly — shows what the authoritative source holds, bypassing all caches | Gold standard for checking NS propagation. If the TLD shows new NS, propagation will complete globally within hours. |
| dig +trace domain.com | Traces the full resolution chain hop by hop: root → TLD → authoritative → record | Shows exactly where in the chain a resolution failure occurs. The output section that returns SERVFAIL or empty identifies the broken hop. |
| dig A ns1.youragency.com | Resolves the IP address of your custom nameserver hostname — verifies glue record is working | If this fails, your glue records are missing or have not propagated. Client domains cannot resolve until this passes. |
| nslookup -type=ns domain.com | Windows-compatible NS lookup — same result as dig NS but available without installing dig | Use on Windows systems where dig is not available. Works in Command Prompt and PowerShell. |
| dig SOA domain.com | Returns the Start of Authority record including the serial number, which increments on zone changes | Verify that your DNS provider has the latest zone version. A stale serial number indicates the zone has not been updated. |
Reading dig Output
A dig NS response has three sections. The QUESTION SECTION shows what you asked. The ANSWER SECTION shows the NS records if the queried resolver has an authoritative or cached answer. The AUTHORITY SECTION shows which nameserver provided the answer. When the ANSWER SECTION is empty and the AUTHORITY SECTION shows your domain's NS, that means the NS is responding but has no record for what you asked.
A dig +trace output is longer. Each block of output corresponds to one hop in the resolution chain. The first block is the root nameserver response. The second is the TLD response with your NS records. The third is your authoritative nameserver's response with the actual record. When a hop fails, the output stops there or shows a SERVFAIL — that block identifies the broken hop.
Using whatsmydns.net for Global Propagation
whatsmydns.net queries DNS from 22 global locations simultaneously and shows NS, A, MX, and other record types per location. For nameserver propagation, select NS record type and enter your domain. Locations that show the new nameservers have completed propagation. Locations still showing the old nameservers are running resolvers that have not yet expired their cached NS records. A mix of old and new is normal during the 24-48 hour propagation window — both nameservers have your records, so the site works from all locations regardless.
Using MXToolbox for Email-Related NS Issues
MXToolbox SuperTool at mxtoolbox.com/SuperTool checks DNS health across email-relevant records. After an NS migration, run an MX lookup on your domain to verify MX records are present at the new nameserver, an SPF check to confirm the TXT record was migrated correctly, and a DKIM check (requires knowing your selector, usually "default" or your email provider's selector) to verify the DKIM public key is present. If the MX lookup shows no records, MX was not added to the new nameserver before the switch — this is fixable by adding MX records at the new provider immediately. Mail servers retry delivery for 4-7 days, so messages sent during the gap are queued and will deliver once MX is correct.
Quick Nameserver Verification Workflow
dig NS yourdomain.com @a.gtld-servers.netExpected: your new nameservers in AUTHORITY or ANSWER section. If old NS shows, wait — registry update is in progress.
dig NS yourdomain.com @8.8.8.8Google's resolver should reflect the new NS within hours of TLD update. If TLD shows new NS but this shows old, resolver cache has not yet expired.
dig +trace yourdomain.comShows every hop. Confirm the third block (authoritative response) comes from your new nameserver and returns the correct A record IP.
dig MX yourdomain.com @your-new-ns-ipReplace your-new-ns-ip with the IP of your new nameserver. Confirms MX records exist at the new provider before propagation completes.
dig A ns1.youragency.comMust return the IP you registered as a glue record. No answer means glue records are not live yet.
Where to Go Next
Nameservers are the authority layer of DNS. Once nameservers are correctly configured, everything else is record-level configuration. The DNS records page covers every record type in detail — A, AAAA, CNAME, MX, TXT, SRV, CAA, and the email authentication trifecta of SPF, DKIM, and DMARC. If nameserver setup is complete and email is still going to spam, that page has the diagnostic sequence.
If you switched to Cloudflare nameservers and want to understand what the orange cloud proxy is actually doing to your traffic, the CDN mechanics page explains cache hit ratios, edge node behavior, and the static versus dynamic content boundary that determines what Cloudflare actually serves from cache versus what always hits your origin.
After any nameserver migration, the first thing to verify on the hosting side is SSL. Most hosts provision certificates automatically, but the automation depends on DNS resolving to their infrastructure. The SSL certificates guide covers the Let's Encrypt renewal mechanics, DV versus OV versus EV certificate types, and exactly what to check when AutoSSL fails after a DNS change.
Finally, if this nameserver page surfaced questions about what the IP address your A record points to actually represents — shared IP versus dedicated IP, IPv4 versus IPv6, and what email deliverability differences come from each — the IP addresses in hosting guide covers the full picture including reverse DNS, PTR records, and the actual evidence on whether dedicated IP improves SEO.
Nameservers FAQ
What is the difference between nameservers and DNS records?
Nameservers are the servers that store and serve your DNS records. DNS records are the actual data stored on those nameservers. The nameserver is the filing cabinet. The DNS records are the files inside it. When you change nameservers, you are telling the internet which filing cabinet to ask. When you change DNS records, you are updating the files inside the cabinet. This distinction matters practically: changing nameservers transfers all DNS management authority to a new provider but does not change your records unless you reconfigure them there. Changing an A record or MX record updates a specific piece of data without affecting which provider answers for your domain. For most site migrations, you only need to update A records, not nameservers.
Should I use my host's nameservers or Cloudflare's?
Use Cloudflare nameservers if your host does not provide a built-in CDN and DDoS protection. The practical difference: with your host's nameservers, traffic goes directly from the visitor to your origin server. With Cloudflare nameservers, traffic goes through Cloudflare's edge network first, which adds a free CDN, WAF, and DDoS protection layer. For most shared hosting setups, switching to Cloudflare nameservers is the single highest-value change you can make in 15 minutes. The only downside is that DNS management moves from your host's panel to Cloudflare's dashboard. Cloudflare's dashboard is strictly better than most host DNS panels, so this is not a real downside in practice.
How long does a nameserver change take to propagate?
A nameserver change takes 24 to 48 hours to fully propagate globally. This is not the same as A record propagation, which is controlled by TTL and can be reduced to 5-15 minutes. NS records are stored at the TLD registry (.com, .net, .org servers) and the TLD registry caches NS records for up to 48 hours regardless of what TTL you set. You can check current TLD propagation status by running: dig NS yourdomain.com @a.gtld-servers.net — this queries the .com TLD server directly and bypasses all resolver caches. When this returns your new nameservers, propagation to most resolvers will complete within a few hours.
Will changing nameservers cause downtime?
It does not have to. The no-downtime approach: add all your DNS records (A, CNAME, MX, SPF, DKIM, DMARC) to the new nameserver provider before you change anything at your registrar. Verify each record is correct with dig. Then change the NS records at your registrar. During the propagation window, some resolvers query the old nameserver and some query the new one — but both should return correct records if you set them up properly. The site stays up throughout. Downtime only happens when people switch nameservers before the new provider has complete records.
What are glue records and when do I need them?
Glue records are IP address entries stored directly at the TLD registry (the .com or .net servers) that resolve a circular reference. You need glue records only when your nameserver hostname is on the same domain it serves. Example: if ns1.youragency.com is the nameserver for youragency.com, resolving ns1.youragency.com requires asking youragency.com's nameserver — which is ns1.youragency.com. The loop cannot be broken without external data. The TLD registry stores the glue record (ns1.youragency.com = IP address) directly so the circular reference is bypassed. You create glue records at your domain registrar under 'Host Records', 'Child Nameservers', or 'Nameserver Registration' depending on the registrar. If your nameservers are on a different domain from the one they serve (e.g. ns1.cloudflare.com serving yourdomain.com), no glue records are needed.
How do I set up custom nameservers for my reseller hosting?
Four steps. First: log into your domain registrar for the domain you want to use as your nameserver hostname (e.g. youragency.com) and create two 'child nameservers' or 'host records': ns1.youragency.com pointing to your first server IP, and ns2.youragency.com pointing to your second server IP. These create glue records at the TLD registry. Second: log into WHM and go to Basic cPanel/WHM Setup. Set Primary Nameserver to ns1.youragency.com and Secondary Nameserver to ns2.youragency.com. Save. Third: wait 30-60 minutes, then verify with: dig A ns1.youragency.com (should return your IP). Fourth: for each client domain, the client updates their nameservers at their own registrar to point to your custom NS. Propagation per client domain takes 24-48 hours.
Can I mix nameservers from different providers?
No. All nameservers listed for a domain must be at the same provider and must return consistent answers. The protocol allows multiple nameservers for redundancy — all of them should serve identical zone data. When resolvers receive inconsistent answers from different nameservers, behavior is unpredictable: some visitors see the correct site, some see nothing, some get mail delivered and some see bounces. Every major DNS provider enforces zone consistency across their own nameservers. If you try to use ns1.cloudflare.com alongside ns2.siteground.net, neither provider serves the zone for the other's NS entries, so resolution fails for any visitor who queries the mismatched nameserver.
My nameservers changed but my site still shows the old hosting. What is wrong?
One of three things. First and most likely: your local resolver or ISP resolver has cached the old NS records and has not yet re-queried the TLD. Test by running dig NS yourdomain.com @8.8.8.8 — if Google's resolver already shows the new NS, the issue is your local cache. Flushing your DNS cache (on Mac: sudo dscacheutil -flushcache; on Windows: ipconfig /flushdns) resolves this immediately for your machine. Second: the NS change propagated but the A records at the new nameserver are wrong or missing. Run dig A yourdomain.com @new-ns-ip to check what the new nameserver returns. Third: propagation is genuinely still in progress. NS changes take up to 48 hours. If it has been under 24 hours and dig @a.gtld-servers.net still shows old NS, that is normal.
What happens to my email when I change nameservers?
Email delivery depends on MX records. When you change nameservers, your MX records move from the old provider to the new one — but only if you recreated them at the new provider before making the switch. This is the most common email failure during NS migrations. Before changing nameservers: open your current DNS zone, write down every MX record and its priority value, add identical records at the new nameserver provider, verify them with dig MX yourdomain.com @new-ns-ip. Then change NS. Email stays continuous because both providers have the same MX data during the propagation window. If you forget to add MX records at the new provider, email stops arriving the moment that resolver starts querying the new nameserver.
What is DNSSEC and should I enable it on my nameservers?
DNSSEC (DNS Security Extensions) adds cryptographic signatures to DNS responses. When a resolver receives a DNS response, it can verify the signature against a public key published in the DNS chain. This prevents cache poisoning attacks, where an attacker injects false DNS responses to redirect your domain to a malicious server. To enable DNSSEC: configure it at your DNS provider first (Cloudflare makes this a single checkbox). This generates a DS record. Then add that DS record to your registrar. The DS record creates a chain of trust from the TLD down to your zone. Enabling DNSSEC at the registrar before configuring it at the DNS provider causes complete resolution failure — the validation check fails with no fallback. For financial sites, healthcare, or any site handling sensitive data, DNSSEC is worth enabling. For a simple blog or content site, it is optional but harmless.
How do I check which nameservers my domain is currently using?
Three methods, each useful in a different context. Command line: run dig NS yourdomain.com and the ANSWER SECTION shows your current nameservers. To check the TLD source directly (bypassing all caches): dig NS yourdomain.com @a.gtld-servers.net for .com domains. Web tool: go to dnschecker.org, enter your domain, select NS record type — it checks from 22 global locations and shows propagation status per location. Most registrar dashboards also show the current NS in your domain management settings, but this shows what you set, not what has propagated.
Can I point subdomains to different nameservers?
Yes, through DNS delegation. A subdomain can be delegated to its own nameserver set using NS records within the parent zone. Example: you can add NS records for shop.yourdomain.com pointing to a completely separate DNS provider. Resolvers that see those NS records will direct all queries for shop.yourdomain.com to those nameservers instead of your main DNS provider. This is called a DNS zone cut or subdomain delegation. It is common for organizations that run separate infrastructure for a subdomain. The mechanics are the same as for root domain NS records: the parent zone holds the delegation NS records, and if the delegated nameserver hostname is on the same subdomain, glue records are needed there too.